- Compatible XF Versions
- 1.5
Description:
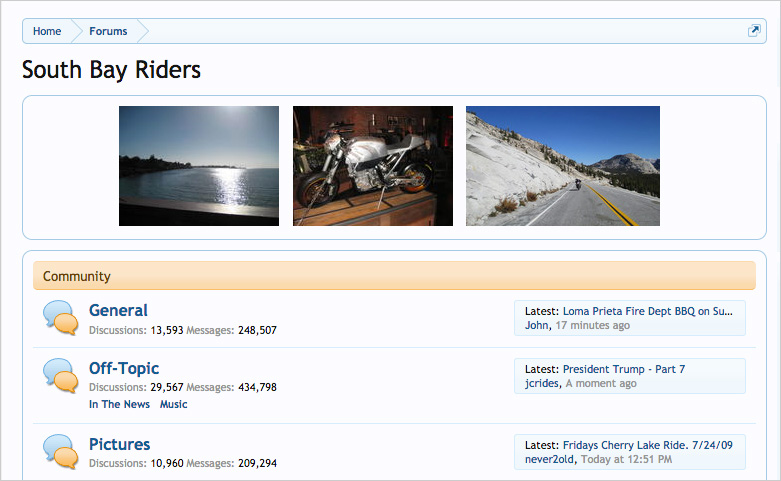
Featured Thumbs will display three small images above your forum list. The images are attachments that your members have posted. Images will change every 10 minutes. Images when clicked will display the message the attachment was posted in.
Live examples:
http://www.kingdaddycaddy.com/
https://wranglertjforum.com/
Your members will love this add-on!
(Example of Featured Thumbs)

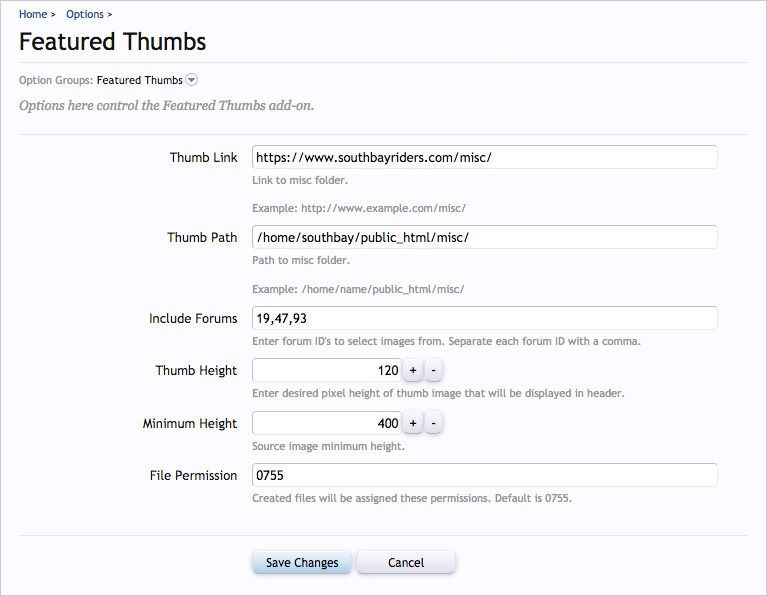
(Example of Options page)

Features:
Requires ImageMagick.
To check if your server has ImageMagick, do the following:
Admin CP -> Options -> Attachments -> Default Image Processor
You should be able to select "ImageMagick PECL Extension". If you cannot select this, you will need to contact your web host provider and ask them to install ImageMagick with PECL.
Installation:
Create a directory in your web root called /misc/ and set permissions to 0755.
Example:
http://www.domain.com/misc/
Featured Thumbs will display three small images above your forum list. The images are attachments that your members have posted. Images will change every 10 minutes. Images when clicked will display the message the attachment was posted in.
Live examples:
http://www.kingdaddycaddy.com/
https://wranglertjforum.com/
Your members will love this add-on!
(Example of Featured Thumbs)

(Example of Options page)

Features:
- Adjustable image size
- Images can be selected from any forum
- Cron job will rotate images every 10 minutes
- Responsive view hides header
Requires ImageMagick.
To check if your server has ImageMagick, do the following:
Admin CP -> Options -> Attachments -> Default Image Processor
You should be able to select "ImageMagick PECL Extension". If you cannot select this, you will need to contact your web host provider and ask them to install ImageMagick with PECL.
Installation:
- Download featuredthumbs_v1.0.zip and unzip it.
- Upload the Andy folder to your server. The correct location is library/Andy.
- From your Admin Control Panel, go to the "Install Add-on" page.
- Upload the addon-FeaturedThumbs_v1.0.xml file
- Click the Install Add-on button.
Create a directory in your web root called /misc/ and set permissions to 0755.
Example:
http://www.domain.com/misc/